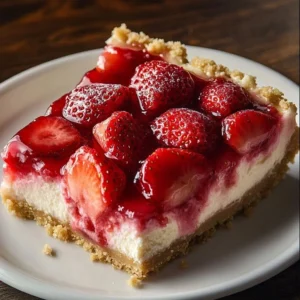
Valentine’s Day Royal Icing Cookies are the perfect sweet treat to celebrate love and affection! These delightful cookies are not only a joy to bake but also a pleasure to decorate and share with those who hold a special place in your heart. With their crisp edges and tender, buttery interiors, these cookies will put a sweet smile on anyone’s face. Plus, the step-by-step process of decorating them with vibrant royal icing allows for creative expression, making it a wonderful activity to enjoy with family and friends. Whether you’re planning a charming surprise for your partner or hosting a fun gathering, these cookies are a delightful addition to your festivities.
Ingredients
To create your Valentine’s Day Royal Icing Cookies, gather the following ingredients, which will transform into a beautiful and delicious treat:
- 1 cup unsalted butter, softened – This creamy base provides a rich texture that melts in your mouth.
- 1 cup granulated sugar – Sweet and sparkling, it adds the perfect touch of sweetness.
- 1 large egg – This ingredient binds everything together, giving the cookies a lovely structure.
- 1 teaspoon vanilla extract – Aromatic and warm, it heightens the flavor profile.
- 2 1/2 cups all-purpose flour – Light and fine, essential for creating soft, tender cookies.
- 1 teaspoon baking powder – This leavening agent ensures the cookies are light and fluffy.
- 1/4 teaspoon salt – Just a pinch brings out all the sweet flavors wonderfully.
For the Royal Icing:
- 3 large egg whites (or 4 oz meringue powder) – This makes a glossy, stiff icing that holds its shape beautifully.
- 4 cups powdered sugar – Sweet and fluffy, needed for that sweetness and texture.
- 1/2 teaspoon lemon juice (or water) – Adds a slight tartness and helps achieve the perfect consistency.
- Red, pink, and white gel food coloring – Vibrant shades to bring your cookie decorations to life.
- Heart-shaped sprinkles (optional) – For that extra touch of love!
- Edible glitter (optional) – Add a sparkle to your cookies and make them extra special.
Cooking Time & Tips For Valentine’s Day Royal Icing Cookies
When preparing these delightful cookies, you have two paths: a quick route for when you’re pressed for time, and a more leisurely pace that allows creativity to shine. The quick method involves mixing the dough, rolling it out, cutting, baking, and icing in under two hours. For a festive atmosphere, consider making the cookie dough in advance and letting it chill overnight. This not only develops flavor but also makes rolling out the dough easier.
Don’t forget these practical tips for success! Ensure your butter is softened to room temperature to achieve that creamy texture when mixing. Flour your surface well while rolling to avoid sticky situations. Lastly, remember that patience is key when it comes to letting the royal icing dry completely. This will ensure your hard work doesn’t smudge and that your cookies look stunning!
Step-by-Step Directions

Preheat your oven to 350°F (175°C) and line a baking sheet with parchment paper. The anticipation of lovely cookies filling your kitchen is almost palpable!
In a large mixing bowl, combine the softened butter and granulated sugar. Beat them together until creamy and fluffy—this step is key for that perfect texture.
Next, add the large egg and one teaspoon of vanilla extract, continuing to beat the mixture until it’s well combined. The aroma of vanilla fills the air, making your kitchen feel warm and inviting.
In a separate bowl, whisk together the flour, baking powder, and salt. This ensures these dry ingredients are evenly mixed and ready to combine.
Gradually introduce the dry ingredient mixture to the buttery mix, stirring with love until a cohesive dough forms. You’ll know it’s ready when it pulls away from the sides of the bowl.
Turn the dough onto a lightly floured surface and roll it out to about 1/4 inch thick. The dough should feel soft yet sturdy under the rolling pin.
Use heart-shaped cookie cutters to cut out the cookies and place them generously onto the prepared baking sheet. Each cut shape is a sweet little promise of love.
Bake in the preheated oven for 8-10 minutes, or until the edges are golden. The delightful smell wafting through your kitchen will have everyone’s mouths watering.
Once baked, remove the cookies from the oven and allow them to cool completely on a wire rack. This is an important step—decorating warm cookies can be a great disaster!
For the royal icing, beat together the egg whites or meringue powder, powdered sugar, and lemon juice until stiff peaks form. This stage is all about achieving that glossy, perfect icing consistency.
Divide the icing into bowls and use red, pink, and white gel food coloring to create delightful shades that scream Valentine’s Day.
Now comes the fun part! Decorate the cooled cookies with the royal icing, adding sprinkles and edible glitter as desired. Let your creativity run wild!
Finally, let the royal icing dry completely before serving or packaging. This patience rewards you with beautifully decorated cookies that shine!
Serving Suggestions & Occasions
These Valentine’s Day Royal Icing Cookies are not just for sharing with your loved ones; they make the perfect centerpiece for any celebration. Set them out on a decorative platter at your next romantic dinner or let them be the star at a children’s party. They are also great for school treats, potlucks, and just because you want to spread some joy! Each cookie can be beautifully boxed or wrapped with a ribbon for a heartfelt gift. Add a personal note to turn them into a charming gesture of love.
Common Mistakes For Valentine’s Day Royal Icing Cookies
Even the best bakers can stumble from time to time, and knowing common mistakes can save your baking day! One typical issue is over-mixing the butter and sugar, leading to a dense cookie. Ensure they are just creamy before adding other ingredients. Also, rolling the dough too thin may lead to burnt or overcooked edges, so watch that thickness carefully. When icing, remember that the royal icing should not be too runny; find a good balance for that beautiful finish. Lastly, not allowing ample drying time for the icing can result in smudged designs. Patience is key!
Healthier Alternatives & Variations
If you’re looking for healthier alternatives, consider substituting half the butter with unsweetened applesauce or using coconut oil for a dairy-free version. You can also swap granulated sugar for coconut sugar or use a sugar substitute suited for baking. For a gluten-free option, try using a blend of gluten-free all-purpose flour. Variations in flavor can also be exciting; add almond extract for a unique twist on vanilla, or incorporate spices like cinnamon or nutmeg for a hint of warmth.
FAQs
Can I use margarine instead of butter?
Yes, margarine can be used, but the taste and texture may differ slightly.How long do the cookies stay fresh?
When stored in an airtight container, they can last up to one week.Can I freeze decorated cookies?
Yes, once the icing is fully set, decorated cookies can be frozen in an airtight container.How do I store royal icing?
Royal icing can be stored in an airtight container in the refrigerator for a week. Give it a good stir before use.What if my royal icing is too runny?
Add more powdered sugar a tablespoon at a time until you reach the desired consistency.Can I customize the shapes of the cookies?
Absolutely! Use any cookie cutter shapes you like, or even make custom templates for unique designs.
Conclusion
There’s something incredibly special about making Valentine’s Day Royal Icing Cookies—they’re more than just a treat; they’re a way to communicate love and affection through the art of baking. The joy of decorating and giving these cookies offers a heartfelt connection that can brighten someone’s day instantly. So why wait? Gather your ingredients, follow the step-by-step directions, and let the sweet aroma of baked goods fill your home. You’ll be creating lasting memories that won’t just be delicious but will also warm hearts!
PrintValentine’s Day Royal Icing Cookies

Delight in these sweet Valentine’s Day cookies decorated beautifully with royal icing, perfect for sharing love and joy.
- Prep Time: 30 minutes
- Cook Time: 10 minutes
- Total Time: 40 minutes
- Yield: 24 cookies 1x
- Category: Dessert
- Method: Baking
- Cuisine: American
- Diet: Vegetarian
Ingredients
- 1 cup unsalted butter, softened
- 1 cup granulated sugar
- 1 large egg
- 1 teaspoon vanilla extract
- 2 1/2 cups all-purpose flour
- 1 teaspoon baking powder
- 1/4 teaspoon salt
- For the Royal Icing:
- 3 large egg whites (or 4 oz meringue powder)
- 4 cups powdered sugar
- 1/2 teaspoon lemon juice (or water)
- Red, pink, and white gel food coloring
- Heart-shaped sprinkles (optional)
- Edible glitter (optional)
Instructions
- Preheat your oven to 350°F (175°C) and line a baking sheet with parchment paper.
- Combine the softened butter and granulated sugar in a large mixing bowl. Beat until creamy and fluffy.
- Add the large egg and one teaspoon of vanilla extract, continuing to beat until well combined.
- Whisk together the flour, baking powder, and salt in a separate bowl.
- Gradually introduce the dry ingredients to the buttery mix, stirring until a cohesive dough forms.
- Turn the dough onto a lightly floured surface and roll it out to about 1/4 inch thick.
- Use heart-shaped cookie cutters to cut out the cookies and place them on the prepared baking sheet.
- Bake for 8-10 minutes, or until the edges are golden.
- Cool the cookies completely on a wire rack.
- Beat the egg whites or meringue powder with powdered sugar and lemon juice until stiff peaks form for the royal icing.
- Divide the icing into bowls and use food coloring to create shades.
- Decorate the cooled cookies with the royal icing, adding sprinkles and glitter as desired.
- Let the royal icing dry completely before serving or packaging.
Notes
Ensure butter is softened for proper mixing. Roll the dough evenly to avoid burnt edges. Allow ample drying time for royal icing.
Nutrition
- Serving Size: 1 cookie
- Calories: 150
- Sugar: 10g
- Sodium: 50mg
- Fat: 6g
- Saturated Fat: 3g
- Unsaturated Fat: 3g
- Trans Fat: 0g
- Carbohydrates: 21g
- Fiber: 0g
- Protein: 2g
- Cholesterol: 15mg