Philadelphia Cherry Cheesecake is a delightful dessert that beautifully combines creamy texture with a sweet and tangy cherry topping. This indulgent cheesecake brings together iconic flavors and is perfect for any occasion, from family gatherings to cozy nights at home. Not only is this recipe simple, but it also evokes nostalgia, making it a comforting favorite for many. In this step-by-step guide, you’ll find everything you need to create this delectable dessert, engaging your senses from the initial preparation to the final sweet bite.
Ingredients
To create this luxurious Philadelphia Cherry Cheesecake, you’ll need the following ingredients, which promise a rich and creamy result:
- 1 1/2 cups of graham cracker crumbs, providing a buttery crunch for the crust.
- 1/4 cup of granulated sugar, adding just the right amount of sweetness.
- 1/2 cup of unsalted butter, melted, infusing the crust with rich flavor.
- 2 packages (8 oz each) of Philadelphia cream cheese, softened for an ultra-creamy filling.
- 1 cup of granulated sugar, to balance the tartness of the cream cheese.
- 3 large eggs, ensuring a perfectly set cheesecake texture.
- 1 tsp of vanilla extract, adding an aromatic sweetness.
- 1/2 cup of sour cream, contributing to the cheesecake’s creamy consistency.
- 1 can (21 oz) of cherry pie filling, for a vibrant and delicious topping.
Cooking Time & Tips for Philadelphia Cherry Cheesecake
When it comes to preparation time, you have the option for a quick or leisurely approach. The total baking time for this cheesecake is around 1 hour, with an additional 4 hours of chilling in the refrigerator. Quick preparation involves following the steps diligently, while slower preparation allows for ample cooling time that enriches the flavors.
Practical Tips for Success:
- Ensure your cream cheese is fully softened before mixing; this helps achieve a smooth texture.
- Be gentle when mixing in the eggs to prevent incorporating too much air, which can lead to cracks.
- Let the cheesecake cool in the oven with the door ajar after baking. This can help reduce the chance of cracks forming on the surface.
Step-by-Step Directions

Preheat your oven to 325°F (160°C) and grease a 9-inch springform pan to ensure easy removal later.
In a mixing bowl, combine the graham cracker crumbs, 1/4 cup of granulated sugar, and melted unsalted butter. Press this mixture firmly into the bottom of the pan, forming a nice, even layer. Bake for 10 minutes and let cool to room temperature.
In another bowl, beat the softened Philadelphia cream cheese with 1 cup of granulated sugar until the mixture is smooth and creamy. Add the eggs one at a time, mixing well after each addition. Stir in the vanilla extract and sour cream until everything is well combined.
Pour the cream cheese mixture over the cooled crust, smoothing the top with a spatula. Bake for 55-60 minutes, or until the edges feel set and a slight jiggle remains in the center.
Once baked, allow the cheesecake to cool to room temperature. Then, transfer it to the refrigerator and chill for at least 4 hours or overnight for the best flavor.
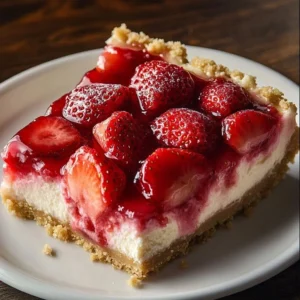
Before serving, top your cheesecake with the cherry pie filling, ensuring an elegant presentation and a burst of fruity flavor with every slice.
Serving Suggestions & Occasions
Philadelphia Cherry Cheesecake is incredibly versatile in its serving occasions. Whether it’s a holiday feast, a birthday celebration, or an office potluck, this cheesecake will impress your guests every time. Pair it with a dollop of whipped cream or vanilla ice cream for an extra indulgent experience. It’s also perfect for an afternoon tea with friends or after a hearty family dinner.
Common Mistakes for Philadelphia Cherry Cheesecake
Even the best bakers can make mistakes. Here are some common pitfalls to watch out for when making your cheesecake:
- Skipping the Cooling Step: Allowing the cheesecake to cool slowly helps prevent cracks from forming due to rapid temperature changes.
- Not Using Room Temperature Ingredients: Cold cream cheese can result in a lumpy filling, so make sure everything is at room temperature.
- Overbaking: Keep an eye on your cheesecake in the oven; overbaking can lead to dryness and cracks.
Healthier Alternatives & Variations
Looking for a healthier spin on Philadelphia Cherry Cheesecake? Here are some alternatives:
- Low-Fat Cream Cheese: Swap out regular cream cheese for low-fat options to reduce calories while still enjoying creamy goodness.
- Greek Yogurt: Replace sour cream with Greek yogurt for an enhanced protein boost and tangy flavor.
- Natural Sweeteners: Consider using honey or agave syrup in place of granulated sugar for a more natural alternative.
- Fruit Variations: Instead of cherry pie filling, explore other toppings like blueberry, strawberry, or even a fresh fruit compote for a seasonal twist.
FAQs
Can I freeze Philadelphia Cherry Cheesecake?
Yes, you can freeze it! Just ensure it’s well wrapped to avoid freezer burn. Thaw it in the refrigerator before serving.How long does this cheesecake last in the fridge?
It typically lasts about 5 to 7 days when properly stored in an airtight container.Can I make this cheesecake gluten-free?
Absolutely! Use gluten-free graham crackers for the crust.What should I do if my cheesecake cracks?
No worries! If it cracks, you can conceal it with cherry pie filling or whipped cream.Can I skip the sour cream?
While it enhances the creaminess, you can try yogurt for a similar effect or simply omit it.What do I serve with Philadelphia Cherry Cheesecake?
It pairs beautifully with coffee, tea, or a tangy fruit salad on the side.
Conclusion
You’ll want to try Philadelphia Cherry Cheesecake immediately! This dessert is not just a treat; it’s a beloved tradition that will delight your taste buds and bring a smile to anyone who enjoys it. The combination of creamy cheesecake with sweet cherry on top is simply irresistible. So gather your ingredients and start baking; once you slice into your homemade cheesecake, you’ll know it was all worth it!
PrintPhiladelphia Cherry Cheesecake

A delightful dessert combining creamy cheesecake with a sweet and tangy cherry topping, perfect for any occasion.
- Prep Time: 15 minutes
- Cook Time: 60 minutes
- Total Time: 255 minutes
- Yield: 8 servings 1x
- Category: Dessert
- Method: Baking
- Cuisine: American
- Diet: Vegetarian
Ingredients
- 1 1/2 cups of graham cracker crumbs
- 1/4 cup of granulated sugar
- 1/2 cup of unsalted butter, melted
- 2 packages (8 oz each) of Philadelphia cream cheese, softened
- 1 cup of granulated sugar
- 3 large eggs
- 1 tsp of vanilla extract
- 1/2 cup of sour cream
- 1 can (21 oz) of cherry pie filling
Instructions
- Preheat your oven to 325°F (160°C) and grease a 9-inch springform pan.
- Combine the graham cracker crumbs, 1/4 cup of granulated sugar, and melted unsalted butter in a mixing bowl. Press this mixture into the bottom of the pan and bake for 10 minutes. Let cool.
- Beat the softened Philadelphia cream cheese with 1 cup of granulated sugar until smooth. Add the eggs one at a time, mixing well after each addition. Stir in the vanilla extract and sour cream.
- Pour the cream cheese mixture over the cooled crust and smooth the top. Bake for 55-60 minutes until the edges feel set.
- Allow the cheesecake to cool to room temperature, then chill in the refrigerator for at least 4 hours or overnight.
- Top your cheesecake with the cherry pie filling before serving.
Notes
Ensure cream cheese is fully softened for smooth mixing. Let the cheesecake cool gradually to prevent cracks.
Nutrition
- Serving Size: 1 slice
- Calories: 350
- Sugar: 22g
- Sodium: 500mg
- Fat: 22g
- Saturated Fat: 10g
- Unsaturated Fat: 8g
- Trans Fat: 0g
- Carbohydrates: 30g
- Fiber: 1g
- Protein: 5g
- Cholesterol: 120mg