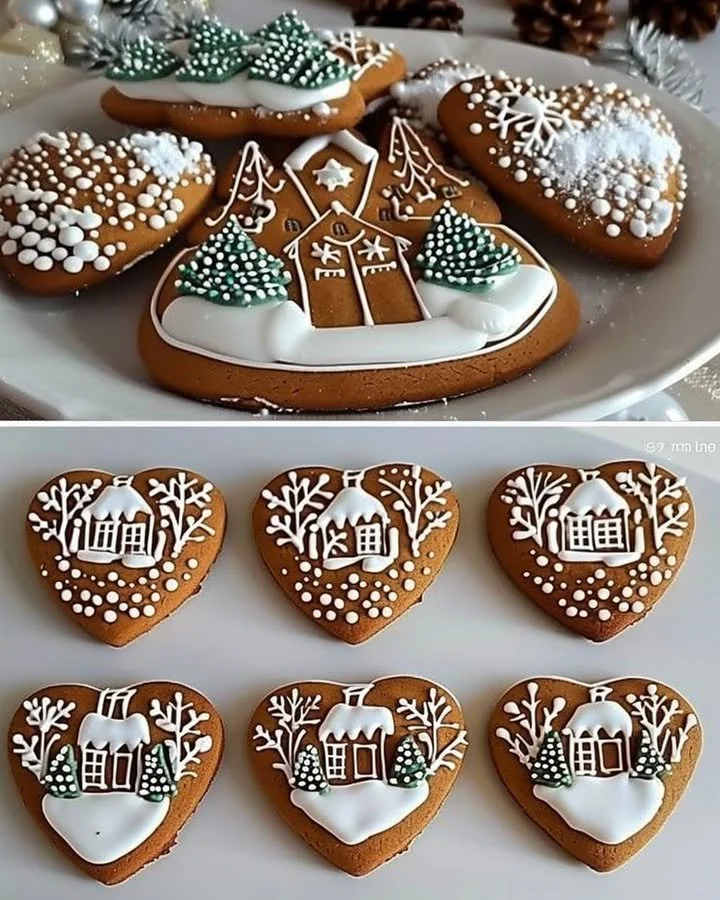
Traditional Gingerbread Cookies with Winter Village Decoration
The aroma of Traditional Gingerbread Cookies wafting through your home is pure magic during the holiday season. As you roll out the spiced dough, you’re enveloped in a cloud of warmth, nostalgia, and festivity. This recipe invites you into a step-by-step culinary adventure, where your kitchen transforms into a winter wonderland filled with charming cookies that evoke childhood memories and laughter. Imagine the joy of decorating gingerbread houses and festive figures, an activity that not only tantalizes the taste buds but also warms the heart. Get ready to embark on this flavorful journey, as we explore the rich textures, vibrant colors, and delightful flavors of these classic cookies.
History / Fun Fact
Gingerbread cookies have a fascinating history that dates back to ancient civilizations, where ginger was prized for its medicinal properties. The tradition of baking gingerbread during the winter holidays flourished in Europe, especially in Germany, where the first documented recipes appeared in the 15th century. The iconic gingerbread houses we know today gained popularity in the 1800s, inspired by the tale of Hansel and Gretel. Using simple ingredients like flour, sugar, and spices, these delicious treats became a symbol of festivity and creativity. Decorating gingerbread cookies has become a beloved family tradition, uniting generations as they craft their winter village scenes.
Ingredients
Creating the perfect gingerbread cookies hinges on selecting quality ingredients that bring warmth and flavor to the dough. You will need 3 1⁄4 cups of all-purpose flour, the foundation for your cookie’s sturdy yet tender texture. A teaspoon of baking soda accompanies the flour, ensuring the cookies rise to the occasion. The aromatic blend of 2 tablespoons of ground ginger, 1 tablespoon of ground cinnamon, and 1/2 teaspoon of ground cloves will infuse your kitchen with a cozy scent. A pinch of salt balances the sweetness of 3/4 cup of unsalted butter, softened to creamy perfection, and 3/4 cup of packed brown sugar, bringing richness and depth. You’ll also need one large egg, 1/2 cup of molasses for a deep, robust flavor, and 1 teaspoon of vanilla extract to sweeten the pot. For the royal icing, gather 2 large egg whites, 1 1/2 cups of powdered sugar, and 1/2 teaspoon of lemon juice – all essential for transforming your cookies into artwork. Feel free to add food coloring for vibrant, eye-catching designs.
Cooking Time & Tips For Traditional Gingerbread Cookies
Preparing gingerbread cookies can be both a quick delight and a slow, thoughtful journey. If you’re in a hurry, the baking process can be completed in under an hour, but the chilling time for the dough is non-negotiable, as it ensures easy handling and shapes retain their form. Plan for a bit of patience, as good things come to those who wait. Practical tips for success include keeping your workspace floured, not overmixing the dough, and ensuring your cookies are completely cooled before decorating. Remember to have fun—the magic of gingerbread lies in the creativity of its decoration.
Step-by-Step Directions
- Preheat the oven to 350°F (175°C) to create the ideal baking environment for your cookies.
- In a mixing bowl, whisk together the flour, baking soda, ginger, cinnamon, cloves, and salt until well combined and aromatic.
- In a separate bowl, cream the softened butter and brown sugar together until light and fluffy, an essential step for a delightful texture. Beat in the egg, followed by the molasses and vanilla extract, stirring until thoroughly smooth.
- Gradually integrate the dry ingredients into the wet mixture, mixing until a cohesive dough forms. The dough should be slightly sticky yet manageable.
- Divide the dough into two halves, wrap them in plastic wrap, and chill in the fridge for at least an hour. This step is crucial for easier rolling.
- Once chilled, lightly flour the surface and roll out the dough to about 1/4 inch thickness. Use your favorite cookie cutters to create gingerbread shapes for your charming winter village—houses, trees, and playful people.
- Bake the cookies in the preheated oven for 8-10 minutes or until golden. Let them cool completely on a wire rack, where their delightful aroma will continue to fill your home.
- To prepare the royal icing, beat the egg whites until foamy, then gradually add the powdered sugar and lemon juice, mixing until stiff peaks form. This icing will harden beautifully, giving your cookies a polished finish.
- Transfer the icing into piping bags and unleash your artistic flair, decorating the gingerbread cookies with enchanting designs—think snowflakes, colorful houses, and festive accents. Add food coloring for an extra pop.
- Allow the icing to harden for 1-2 hours before displaying or serving, creating pieces of edible art that can hold their own at any holiday gathering.
Serving Suggestions & Occasions
Traditional Gingerbread Cookies are the perfect centerpiece for holiday gatherings, children’s parties, or family baking nights. They serve not only as delightful treats but also as festive decorations for your table. Pair these cookies with a steaming mug of spiced hot chocolate or a rich cup of tea for the ultimate comforting experience. They are ideal for gifting, beautifully wrapped in cellophane and tied with an elegant ribbon, sharing the warmth and joy of the season with loved ones.
Common Mistakes For Traditional Gingerbread Cookies
Avoid the common pitfall of overworking the dough—this can lead to tough cookies. Ensure your butter is adequately softened to achieve that light, fluffy texture when creamed. Don’t skip the chilling step; warm dough can be difficult to roll and will lose shape when baked. Additionally, underbaking can lead to cookies that are too soft to decorate, while overbaking will yield dry cookies. Following the measurements precisely is also key; even a small deviation can alter the final product significantly.
Healthier Alternatives & Variations
For a healthier twist on traditional gingerbread cookies, consider substituting whole wheat flour for all-purpose flour to increase fiber content. You can also reduce the sugar by incorporating unsweetened applesauce or using natural sweeteners like honey or maple syrup. For a vegan version, replace the egg with a flaxseed substitute and use plant-based butter. Adding nuts, raisins, or oats can introduce unique flavors and textures that complement the spiced cookie base, making your gingerbread experience even more delightful.
FAQs
Can I make gingerbread cookies in advance?
Yes! The dough can be prepared and chilled a few days ahead. You can also bake the cookies and store them in an airtight container.How should I store my gingerbread cookies?
Store the cooled cookies in an airtight container at room temperature for up to a week. For longer storage, freeze them in a sealed bag.Can I use store-bought icing?
While you can use store-bought icing, homemade royal icing will set better and provides a beautiful finish.How can I make my cookies softer?
To achieve softer gingerbread cookies, consider reducing the baking time slightly or adding a bit more molasses.Will the cookies hold their shape during baking?
If the dough is chilled properly and rolled out to the right thickness, the cookies will retain their shape when baked.What decorations can I use besides royal icing?
You can use colored sugar, sprinkles, or melted chocolate for creative designs and extra flair!
Conclusion
Your journey into the world of Traditional Gingerbread Cookies with Winter Village Decoration awaits you this holiday season. Each cookie tells a story, inviting not just the love of baking but the joy of creating cherished memories with family and friends. The enticing aromas, the creativity of decorating, and the sweetness of sharing make this recipe a perfect embodiment of the holiday spirit. So don your apron, gather your loved ones, and get ready to craft a delightful gingerbread village that will not only tantalize your taste buds but also warm your heart. Don’t wait—let’s start baking!
PrintTraditional Gingerbread Cookies with Winter Village Decoration

Embark on a festive journey with these Traditional Gingerbread Cookies, perfect for holiday decorating and sharing.
- Prep Time: 15 minutes
- Cook Time: 10 minutes
- Total Time: 85 minutes
- Yield: 24 servings 1x
- Category: Dessert
- Method: Baking
- Cuisine: American
- Diet: Vegetarian
Ingredients
- 3 1/4 cups all-purpose flour
- 1 teaspoon baking soda
- 2 tablespoons ground ginger
- 1 tablespoon ground cinnamon
- 1/2 teaspoon ground cloves
- 1 pinch salt
- 3/4 cup unsalted butter, softened
- 3/4 cup packed brown sugar
- 1 large egg
- 1/2 cup molasses
- 1 teaspoon vanilla extract
- 2 large egg whites (for royal icing)
- 1 1/2 cups powdered sugar (for royal icing)
- 1/2 teaspoon lemon juice (for royal icing)
Instructions
- Preheat the oven to 350°F (175°C).
- Whisk together the flour, baking soda, ginger, cinnamon, cloves, and salt in a mixing bowl.
- Cream the softened butter and brown sugar together until light and fluffy.
- Beat in the egg, followed by the molasses and vanilla extract, mixing until smooth.
- Gradually integrate the dry ingredients into the wet mixture, mixing until a cohesive dough forms.
- Divide the dough into two halves, wrap in plastic wrap, and chill in the fridge for at least an hour.
- Roll out the chilled dough to about 1/4 inch thickness with floured surface.
- Use cookie cutters to create gingerbread shapes, then place them on a baking sheet.
- Bake for 8-10 minutes or until golden and let cool completely on a wire rack.
- Beat the egg whites for royal icing until foamy, then add powdered sugar and lemon juice until stiff peaks form.
- Transfer the icing into piping bags and decorate the cookies as desired.
- Allow the icing to harden for 1-2 hours before serving or displaying.
Notes
For added fun, feel free to use food coloring to make your icing vibrant and festive. Keep the workspace floured to avoid sticking.
Nutrition
- Serving Size: 1 cookie
- Calories: 150
- Sugar: 8g
- Sodium: 50mg
- Fat: 5g
- Saturated Fat: 3g
- Unsaturated Fat: 2g
- Trans Fat: 0g
- Carbohydrates: 22g
- Fiber: 1g
- Protein: 2g
- Cholesterol: 20mg