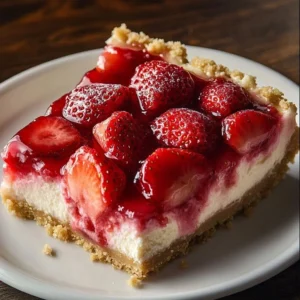
Homemade Cherry Vanilla Ice Cream is a delightful treat that captures the essence of summer in every scoop. This creamy and aromatic dessert is bursting with the sweet-tart flavor of cherries, perfectly balanced by the warmth of vanilla. It’s the kind of dish that evokes nostalgia, reminding us of carefree days spent enjoying chilled treats under the sun with family and friends. The process of making this ice cream is easy and fun, perfect for both experienced chefs and beginners. With its comforting qualities and family-friendly vibe, it’s certainly a recipe worth making!
Ingredients
To make Homemade Cherry Vanilla Ice Cream, you’ll need the following ingredients:
- 2 cups of heavy cream: This rich and creamy base will create a luscious texture that melts in your mouth.
- 1 cup of whole milk: Adding this milk enriches the flavor and helps create the perfect balance between creaminess and sweetness.
- 3/4 cup of granulated sugar: This sweetener will enhance the natural flavors of the cherries and vanilla.
- 1 tablespoon of vanilla extract: The aromatic notes of vanilla will give your ice cream a warm, inviting taste.
- 1 cup of fresh or frozen cherries, pitted and chopped: Juicy and vibrant, cherries add a delightful burst of flavor and color to the ice cream.
- 1/2 teaspoon of salt: This essential ingredient enhances all the flavors, allowing them to shine.
- Optional: additional cherries for serving: These can be a beautiful and delicious garnish to elevate your dessert presentation.
Cooking Time & Tips For Homemade Cherry Vanilla Ice Cream
When it comes to preparing Homemade Cherry Vanilla Ice Cream, you can opt for a quick or a slow preparation. The quick method involves blending your ingredients and churning them immediately, while slower preparation allows for a more developed flavor as the mixture chills beforehand.
For the best results, here are some practical tips:
- Ensure your ice cream maker bowl is thoroughly frozen before beginning.
- If you are using fresh cherries, make sure they are ripe and sweet for the best flavor.
- Taste your mixture before churning; feel free to adjust the sweetness to your liking.
Step-by-Step Directions

- In a spacious mixing bowl, combine the heavy cream, whole milk, granulated sugar, vanilla extract, and salt. Stir gently until the sugar is dissolved.
- Fold in the pitted and chopped cherries, making sure they’re evenly distributed throughout the mixture.
- Pour the mixture into an ice cream maker and churn according to the manufacturer’s instructions, which typically takes about 20-25 minutes. Watch as the mixture transforms from liquid to a thick, creamy delight!
- Transfer the mixture into an airtight container, seal it well, and freeze for at least 4 hours until firm. Patience is key for achieving that perfect scoopable consistency.
- Serve in bowls or cones, topped with additional cherries if desired, for a delightful finishing touch.
Serving Suggestions & Occasions
Homemade Cherry Vanilla Ice Cream is versatile and can be served on various occasions. Think about enjoying it as a refreshing dessert after a summer barbecue, or as a sweet treat during family movie nights. It also pairs wonderfully with a slice of chocolate cake or a warm cherry pie for an indulgent treat. Consider serving your ice cream in a classic cone for a nostalgic experience, or in sundae dishes topped with nuts or whipped cream for an extra special touch.
Common Mistakes For Homemade Cherry Vanilla Ice Cream
While making ice cream can be an enjoyable experience, there can be pitfalls to avoid:
- Not chilling your mixture sufficiently before churning can lead to a less creamy texture.
- Over-churning may result in icy rather than smooth ice cream.
- Forgetting to pit the cherries can lead to unpleasant surprises!
Being attentive to these details will help ensure your ice cream turns out creamy and delicious every time.
Healthier Alternatives & Variations
If you want to make a lighter version of this dessert, consider using low-fat milk or substituting some of the cream with Greek yogurt to cut down on calories while still maintaining a rich taste. You can also customize the recipe by experimenting with different fruits like strawberries or blueberries, or adding chunks of dark chocolate or nuts for extra texture and flavor.
FAQs
Can I make this ice cream without an ice cream maker?
Yes! Combine the ingredients, place them in a shallow dish, and freeze. Stir every 30-45 minutes until it reaches the desired consistency.How long does Homemade Cherry Vanilla Ice Cream last in the freezer?
It can typically last for about 2-3 weeks in the freezer, though it’s best enjoyed within the first week for optimal flavor and texture.Can I use frozen cherries instead of fresh?
Absolutely! Frozen cherries work great as they are just as flavorful and will save you some prep time.Is this recipe suitable for vegans?
This recipe is not vegan-friendly, but you can substitute the cream and milk with coconut cream and almond milk for a dairy-free version.How can I make this ice cream more flavorful?
Try macerating the cherries in a bit of sugar before mixing them in, or add a splash of almond extract for an additional layer of flavor.Can I add other mix-ins?
Definitely! Feel free to get creative by tossing in nuts, chocolate chips, or even swirls of fudge or caramel.
Conclusion
Homemade Cherry Vanilla Ice Cream is not just a recipe; it’s a celebration of flavors and memories. With its vibrant colors and irresistible taste, this dessert is bound to become a favorite for all ages. So, gather your ingredients, follow the easy step-by-step directions, and indulge in the joy of homemade ice cream today. Your kitchen and your taste buds will thank you for it!
PrintHomemade Cherry Vanilla Ice Cream

A delightful summer treat bursting with the sweet-tart flavor of cherries and the warmth of vanilla, perfect for hot days.
- Prep Time: 15 minutes
- Cook Time: 25 minutes
- Total Time: 295 minutes
- Yield: 4 servings 1x
- Category: Dessert
- Method: Churning
- Cuisine: American
- Diet: Vegetarian
Ingredients
- 2 cups of heavy cream
- 1 cup of whole milk
- 3/4 cup of granulated sugar
- 1 tablespoon of vanilla extract
- 1 cup of fresh or frozen cherries, pitted and chopped
- 1/2 teaspoon of salt
- Optional: additional cherries for serving
Instructions
- Combine the heavy cream, whole milk, granulated sugar, vanilla extract, and salt in a spacious mixing bowl. Stir gently until the sugar is dissolved.
- Fold in the pitted and chopped cherries, making sure they’re evenly distributed throughout the mixture.
- Pour the mixture into an ice cream maker and churn according to the manufacturer’s instructions, typically taking about 20-25 minutes.
- Transfer the mixture into an airtight container, seal it well, and freeze for at least 240 minutes until firm.
- Serve in bowls or cones, topped with additional cherries if desired.
Notes
For the best results, ensure your ice cream maker bowl is thoroughly frozen before beginning. Taste the mixture before churning and adjust sweetness if needed.
Nutrition
- Serving Size: 1 scoop
- Calories: 350
- Sugar: 30g
- Sodium: 100mg
- Fat: 25g
- Saturated Fat: 15g
- Unsaturated Fat: 10g
- Trans Fat: 0g
- Carbohydrates: 40g
- Fiber: 1g
- Protein: 4g
- Cholesterol: 100mg