
Gingerbread Cookies with Winter Forest Design are a delightful treat that perfectly captures the essence of the holiday season. These aromatic cookies, with their warm spices and enchanting designs, evoke feelings of nostalgia, comfort, and togetherness. The moment you take your first bite, you’ll be transported to a winter wonderland, where the sweet scent of ginger, cinnamon, and nutmeg fills the air. Ideal for family gatherings, cookie decorating sessions, or holiday parties, this step-by-step recipe guides you through the process of creating these festive delights.
Why You’ll Love This Recipe
This Gingerbread Cookies with Winter Forest Design recipe offers a variety of reasons to love it. With easy preparation and minimal cooking time, you can whip these up without any fuss. They make for a fantastic crowd-pleaser, captivating the hearts of both children and adults alike. Moreover, the ingredients are pantry staples, so you won’t have to make a special trip to the store. The combination of impressive visuals and delightful flavors ensures each cookie is a treat for the senses.
Ingredients
To create these enchanting Gingerbread Cookies, gather the following ingredients:
- 3 1⁄4 cups (400g) all-purpose flour – The foundation of our delicious cookies, this flour provides the perfect texture.
- 3⁄4 teaspoon baking soda – This leavening agent helps our cookies rise just right.
- 1 tablespoon ground ginger – Earthy and aromatic, it’s essential for that signature gingerbread flavor.
- 1 tablespoon ground cinnamon – Adds a touch of warmth and spiciness, making every bite comforting.
- 1⁄4 teaspoon ground cloves – A hint of spice that elevates the flavor profile.
- 1⁄4 teaspoon nutmeg – This warm, nutty flavor complements the other spices beautifully.
- 1/2 teaspoon salt – Balances the sweetness and enhances the flavors.
- 1/2 cup (115g) unsalted butter, softened – Creamy and rich, it adds moisture and flavor.
- 1/2 cup (100g) packed brown sugar – A sweet, caramel-like richness makes for a delightful cookie.
- 1large egg – Binds the ingredients together and gives structure.
- 2/3 cup (160ml) unsulfured molasses – The star of the recipe, adding deep sweetness and a beautiful color.
- 1 teaspoon pure vanilla extract – Enhances the flavors and adds a hint of warmth.
- 3 cups (360g) powdered sugar – Essential for the royal icing, creating a sweet and decorative finish.
- 2 large egg whites or 3 tablespoons meringue powder mixed with 6 tablespoons water – Used for the royal icing to achieve a perfectly smooth texture.
- 1/2 teaspoon vanilla or almond extract – Adds an additional layer of flavor to the icing.
- Gel food coloring (green, white, brown, and optional blue) – To bring your winter forest designs to life.
- Edible gold dust (optional for the deer) – Adds a shimmering touch to your designs.
- Fine sugar or edible glitter for snow effect – Creates a magical snowy appearance on your cookies.
Step-by-Step Directions
Begin by whisking together the all-purpose flour, baking soda, ground ginger, cinnamon, cloves, nutmeg, and salt in a medium bowl. Once combined, set the mixture aside.
In a large bowl, take the softened butter and brown sugar, creaming them together until the mixture is light and fluffy. Add the egg, unsulfured molasses, and vanilla extract, mixing until everything is well combined.
Gradually add the dry ingredients from the first bowl into the wet mixture, stirring until a dough forms. If the dough feels too sticky, don’t hesitate to add a little more flour to help it firm up.
Divide the dough into two equal portions, wrap each in plastic wrap, and refrigerate for at least one hour. This chilling step enhances the flavors and makes the dough easier to work with.
Preheat your oven to 350°F (175°C). While the oven heats up, line two baking sheets with parchment paper to prevent sticking.
On a lightly floured surface, roll out one portion of the chilled dough to about 1/4 inch in thickness. Use your favorite cookie cutters to create shapes like trees, deer, and snowflakes.
Place the cookie cutouts onto the prepared baking sheets and bake them for 8-10 minutes. They’ll be ready when the edges are lightly golden—watch them closely to avoid overbaking!
Allow the cookies to cool on the baking sheets for a few minutes before transferring them to a wire rack to cool completely. This step is crucial for maintaining the right texture.
To prepare the royal icing, beat the egg whites (or meringue powder mixture) in a large bowl until they reach stiff peaks. Gradually incorporate the powdered sugar and vanilla extract, beating until smooth and stiff.
Divide the royal icing into multiple bowls and add gel food coloring to each to achieve your desired winter palette—green for trees, brown for deer, white for snow, etc.
Using piping bags fitted with small tips, pipe the royal icing onto the cookies, creating intricate winter forest designs. Feel free to get creative with trees, deer, snowflakes, and even a snowy background!
For added elegance, sprinkle edible gold dust on the deer shapes, and use fine sugar or edible glitter to give a snow-kissed effect on the cookies. A small brush can be helpful for detailed work.
Let the royal icing dry completely before serving or packaging your beautiful cookies. This step ensures your designs hold their shape and look stunning for gifting.
Tips & Tricks
For the best results with your Gingerbread Cookies, remember a few key tips: Make sure your butter is at room temperature to achieve the perfect creamy consistency. When rolling out the dough, use as little flour as possible on the surface to maintain the dough’s flavor. Dough can become sticky, so it’s crucial to chill it properly; forgetting this step may lead to misshapen cookies. Additionally, take advantage of your imagination with the icing—experiment with different designs and colors to make your cookies truly unique.
Serving Suggestions & Pairings
These Gingerbread Cookies with Winter Forest Design are perfect for holiday gatherings and parties. Serve them on a festive platter alongside a warming cup of spiced tea or hot cocoa for a delightful treat. They also make wonderful gifts; package them in a decorative tin or tin foil to share the joy of baking with friends and family. The cookies can double as a fun winter activity, letting everyone join in on the decoration and creativity.
Nutritional Information
One gingerbread cookie (approx. 30g) contains about 120 calories, with 4g of fat, 18g of carbohydrates, and 1g of protein. While these cookies are a delicious indulgence, remember to enjoy them in moderation. Balance is key, especially during the festive season when sweet treats are everywhere.
Storing Tips & Variations
To keep your Gingerbread Cookies fresh, store them in an airtight container in a cool, dry place. They can last for up to a week—but you can also freeze the baked cookies for up to three months. Just remember to wrap them tightly in plastic wrap before freezing. Explore variations, such as adding chopped nuts or dried fruits for texture or adapting the spices based on your personal preference. You could even turn the cookies into gingerbread houses for an entirely different holiday experience!
Conclusion
Now is the perfect time to gather your family and friends to try your hand at making these delightful Gingerbread Cookies with Winter Forest Design. The wonderful aroma that fills your kitchen will make anyone feel warm and nostalgic, and decorating the cookies can be a bonding experience. Don’t forget to share your experience and how your cookies turned out—you may even inspire others to try this festive recipe!
FAQs
Can I use molasses alternatives?
Absolutely! If you don’t have molasses on hand, you can use honey or maple syrup, though the flavor and color may slightly differ.How can I make these cookies vegan?
To make them vegan, substitute butter with a plant-based alternative and replace the egg with flaxseed meal mixed with water or a commercial egg replacer.What can I do if my dough is too sticky?
If the dough is sticky, simply sprinkle a little more flour while rolling it out or mix in a bit more flour while making the dough until it reaches a workable consistency.How can I achieve perfect royal icing consistency?
Aim for a thick frosting-like consistency for outlining and a thinner syrup-like consistency for flooding. You may achieve this by adjusting the powdered sugar amount while mixing.Can I decorate cookies a day in advance?
Definitely! Decorating the cookies a day ahead is a great idea. Just ensure that the royal icing is thoroughly dried before stacking or packaging them to avoid smudging.
Gingerbread Cookies with Winter Forest Design
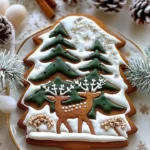
Delightful Gingerbread Cookies decorated with a charming winter forest design, perfect for holiday gatherings.
- Prep Time: 30 minutes
- Cook Time: 10 minutes
- Total Time: 1 hour 40 minutes
- Yield: 24 cookies 1x
- Category: Dessert
- Method: Baking
- Cuisine: American
- Diet: Vegetarian
Ingredients
- 3 1⁄4 cups (400g) all-purpose flour
- 3⁄4 teaspoon baking soda
- 1 tablespoon ground ginger
- 1 tablespoon ground cinnamon
- 1⁄4 teaspoon ground cloves
- 1⁄4 teaspoon nutmeg
- 1/2 teaspoon salt
- 1/2 cup (115g) unsalted butter, softened
- 1/2 cup (100g) packed brown sugar
- 1 large egg
- 2/3 cup (160ml) unsulfured molasses
- 1 teaspoon pure vanilla extract
- 3 cups (360g) powdered sugar
- 2 large egg whites or 3 tablespoons meringue powder mixed with 6 tablespoons water
- 1/2 teaspoon vanilla or almond extract
- Gel food coloring (green, white, brown, and optional blue)
- Edible gold dust (optional for the deer)
- Fine sugar or edible glitter for snow effect
Instructions
- Begin by whisking together the all-purpose flour, baking soda, ground ginger, cinnamon, cloves, nutmeg, and salt in a medium bowl. Once combined, set the mixture aside.
- In a large bowl, take the softened butter and brown sugar, creaming them together until the mixture is light and fluffy. Add the egg, unsulfured molasses, and vanilla extract, mixing until everything is well combined.
- Gradually add the dry ingredients from the first bowl into the wet mixture, stirring until a dough forms. If the dough feels too sticky, don’t hesitate to add a little more flour to help it firm up.
- Divide the dough into two equal portions, wrap each in plastic wrap, and refrigerate for at least one hour.
- Preheat your oven to 350°F (175°C). Line two baking sheets with parchment paper.
- On a lightly floured surface, roll out one portion of the chilled dough to about 1/4 inch in thickness. Use cookie cutters to create shapes.
- Place the cookie cutouts onto the baking sheets and bake for 8-10 minutes.
- Allow the cookies to cool on the baking sheets for a few minutes before transferring them to a wire rack.
- To prepare the royal icing, beat the egg whites (or meringue powder mixture) until stiff peaks form. Gradually incorporate the powdered sugar and vanilla extract.
- Divide the royal icing into bowls and add gel food coloring for desired designs.
- Using piping bags, pipe the royal icing onto the cookies, creating intricate designs.
- For added elegance, sprinkle edible gold dust on the deer shapes and fine sugar for a snowy effect.
- Let the royal icing dry completely before serving or packaging your cookies.
Notes
Make sure your butter is at room temperature and chill the dough properly to avoid misshapen cookies.
Nutrition
- Serving Size: 1 cookie
- Calories: 120
- Sugar: 18g
- Sodium: 50mg
- Fat: 4g
- Saturated Fat: 2g
- Unsaturated Fat: 2g
- Trans Fat: 0g
- Carbohydrates: 18g
- Fiber: 0g
- Protein: 1g
- Cholesterol: 20mg