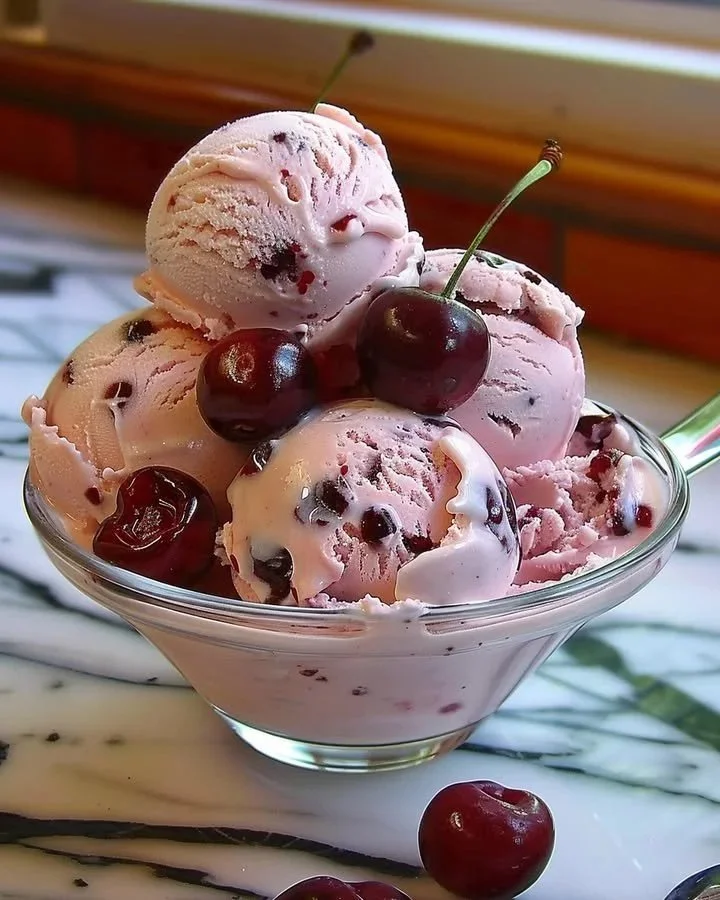
Homemade Cherry Ice Cream is a delightful treat that transports you back to sunny days spent enjoying the simple pleasures of summer. This recipe is not only a cooling sensation on a hot day, but it also captures the essence of fresh cherries in a creamy and rich dessert. With easy step-by-step directions, even those who are new to ice cream making can successfully whip up this unforgettable flavor. So, gather your ingredients and prepare for a delightful experience that is sure to impress family and friends!
Ingredients
For this luscious Homemade Cherry Ice Cream, you’ll need the following ingredients that blend together perfectly to create an irresistible dessert:
- 2 cups fresh cherries: These tender, vibrant gems burst with flavor and sweetness, offering a deliciously fruity base.
- 1 cup heavy cream: The creamy, rich texture of heavy cream creates the perfect base for your ice cream, making each bite indulgent.
- 1 cup whole milk: Nutty and slightly sweet, whole milk adds a smoothness that balances the richness of the heavy cream.
- 3/4 cup granulated sugar: This sweetener enhances the natural flavors of the cherries and cream, making the ice cream decadently sweet.
- 1 teaspoon vanilla extract: The aromatic notes of vanilla deepen the overall flavor, adding warmth and richness.
- A pinch of salt: This crucial ingredient brightens the sweetness and brings out the best in all the flavors.
Cooking Time & Tips For Homemade Cherry Ice Cream
Creating your own ice cream can be a delightful experience, whether you opt for a quick approach or take your time to savor the process. The quick method involves using an ice cream maker, which allows you to churn the mixture efficiently. If you have extra time and patience, allowing the cherries to macerate longer enhances their flavor and sweetness, resulting in a more intense cherry experience.
Tips for Success:
- Make sure to use ripe cherries for the best flavor.
- Allow the cherry mixture to macerate for at least 30 minutes to enhance the flavor.
- Always chill your ice cream mixture before churning; this step will help achieve the perfect creamy texture.
Step-by-Step Directions

Step 1: Toss the pitted and halved cherries with 1/4 cup of granulated sugar in a bowl and let sit for 30 minutes to macerate. This allows the cherries to release their juices, intensifying their flavor and sweetness.
Step 2: In another bowl, whisk together the heavy cream, whole milk, the remaining sugar, vanilla extract, and a pinch of salt until the mixture is smooth and all the ingredients are well combined. Watch as the mixture becomes creamy and luscious.
Step 3: Once the creams blend together beautifully, fold the cherry mixture into the cream mixture until well combined. Make sure to gently mix to preserve the cherry pieces’ texture while incorporating all flavors.
Step 4: Pour the mixture into an ice cream maker and churn according to the manufacturer’s instructions. During this process, take a moment to enjoy the sweet aroma filling your kitchen.
Step 5: Once it reaches a soft-serve consistency, transfer to a lidded container and freeze for at least 4 hours until firm. Patience is key; the longer it freezes, the better the texture will be.
Step 6: Finally, serve the cherry ice cream in a bowl or cone, and don’t forget to savor each spoonful! The taste of homemade, creamy goodness is definitely a moment worth celebrating.
Serving Suggestions & Occasions
Homemade Cherry Ice Cream is perfect for various occasions. It can be the highlight of a summer picnic, a delightful dessert at a family gathering, or a refreshing treat after a long day. Consider garnishing with fresh mint leaves or drizzling with chocolate syrup for an extra touch. It also pairs beautifully with warm desserts like pie or crumbles—just imagine a scoop on top of a slice of cherry pie!
Common Mistakes For Homemade Cherry Ice Cream
When making Homemade Cherry Ice Cream, there are a few common pitfalls that can easily be avoided:
- Skipping the maceration step: This crucial element enhances the flavor of the cherries.
- Not properly chilling the mixture: Chill your cream mixture before churning to ensure a creamy texture.
- Over-churning: Keep an eye on the consistency; over-churning can lead to an icy texture rather than creamy smoothness.
Healthier Alternatives & Variations
If you’re looking for healthier alternatives or variations of Homemade Cherry Ice Cream, consider the following options:
- Low-fat options: Substitute whole milk with low-fat milk or use coconut milk for a dairy-free alternative.
- Sweeteners: Swap granulated sugar with honey or maple syrup for a more natural sweetness.
- Add-ins: Experiment with various mix-ins like chopped nuts, dark chocolate chunks, or even some Greek yogurt for a tangy twist.
FAQs
Can I use frozen cherries instead of fresh?
Yes, you can use frozen cherries, but let them thaw and drain excess water before macerating.Do I need an ice cream maker?
While an ice cream maker helps achieve the creamy texture, you can use a freezer-safe container and stir the mixture every 30 minutes until firm.How long can I store Homemade Cherry Ice Cream?
If stored in an airtight container, it can last in the freezer for about 2-3 weeks.What if I don’t have heavy cream?
You can substitute it with half-and-half or make your own by mixing milk and unsalted butter.Can I make this dairy-free?
Yes, use coconut milk or almond milk along with a dairy-free cream alternative.Why does my cherry ice cream turn icy?
This usually happens if the mixture is churned too long or not properly pre-chilled.
Conclusion
With its rich, creamy texture and the delightful burst of fresh cherries, Homemade Cherry Ice Cream is a recipe you won’t want to miss. The step-by-step process allows anyone to create this indulgent treat, and the satisfaction of making your own ice cream is unmatched. So why wait? Gather your ingredients, channel your inner ice cream maker, and enjoy this delicious homemade delight!
PrintHomemade Cherry Ice Cream

A delightful and creamy homemade cherry ice cream that captures the essence of fresh cherries, perfect for hot summer days.
- Prep Time: 30 minutes
- Cook Time: 240 minutes
- Total Time: 270 minutes
- Yield: 4 servings 1x
- Category: Dessert
- Method: Churning
- Cuisine: American
- Diet: Vegetarian
Ingredients
- 2 cups fresh cherries
- 1 cup heavy cream
- 1 cup whole milk
- 3/4 cup granulated sugar
- 1 teaspoon vanilla extract
- A pinch of salt
Instructions
- Toss the pitted and halved cherries with 1/4 cup of granulated sugar in a bowl and let sit for 30 minutes to macerate.
- In another bowl, whisk together the heavy cream, whole milk, the remaining sugar, vanilla extract, and a pinch of salt until the mixture is smooth.
- Fold the cherry mixture into the cream mixture until well combined.
- Pour the mixture into an ice cream maker and churn according to the manufacturer’s instructions.
- Once it reaches a soft-serve consistency, transfer to a lidded container and freeze for at least 240 minutes until firm.
- Finally, serve the cherry ice cream in a bowl or cone, and savor each spoonful!
Notes
Use ripe cherries for the best flavor and chill your mixture before churning for a creamy texture.
Nutrition
- Serving Size: 1 serving
- Calories: 280
- Sugar: 22g
- Sodium: 50mg
- Fat: 16g
- Saturated Fat: 10g
- Unsaturated Fat: 4g
- Trans Fat: 0g
- Carbohydrates: 31g
- Fiber: 1g
- Protein: 4g
- Cholesterol: 55mg