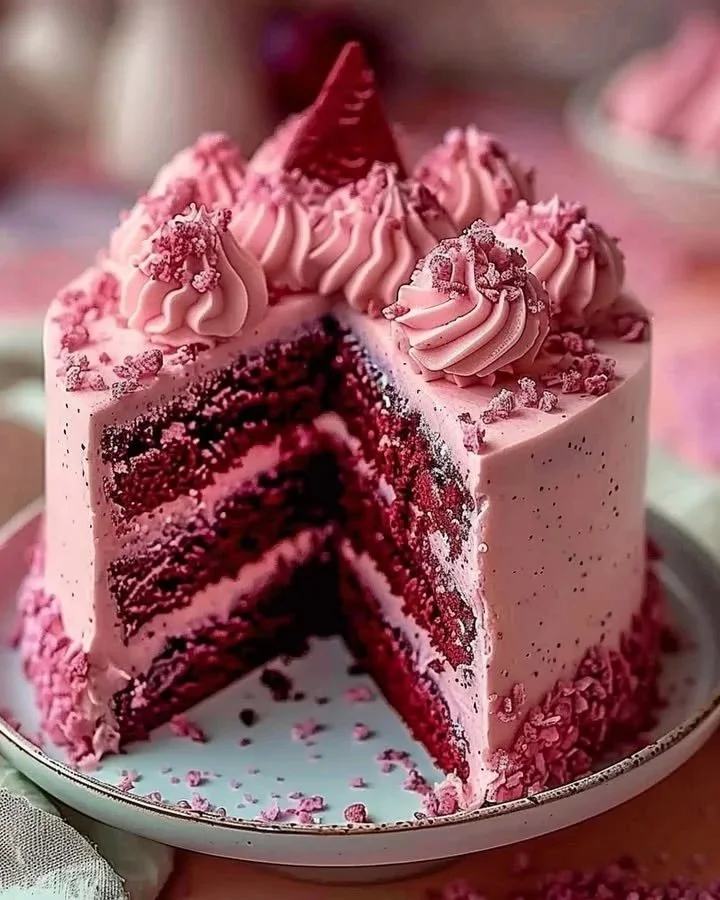
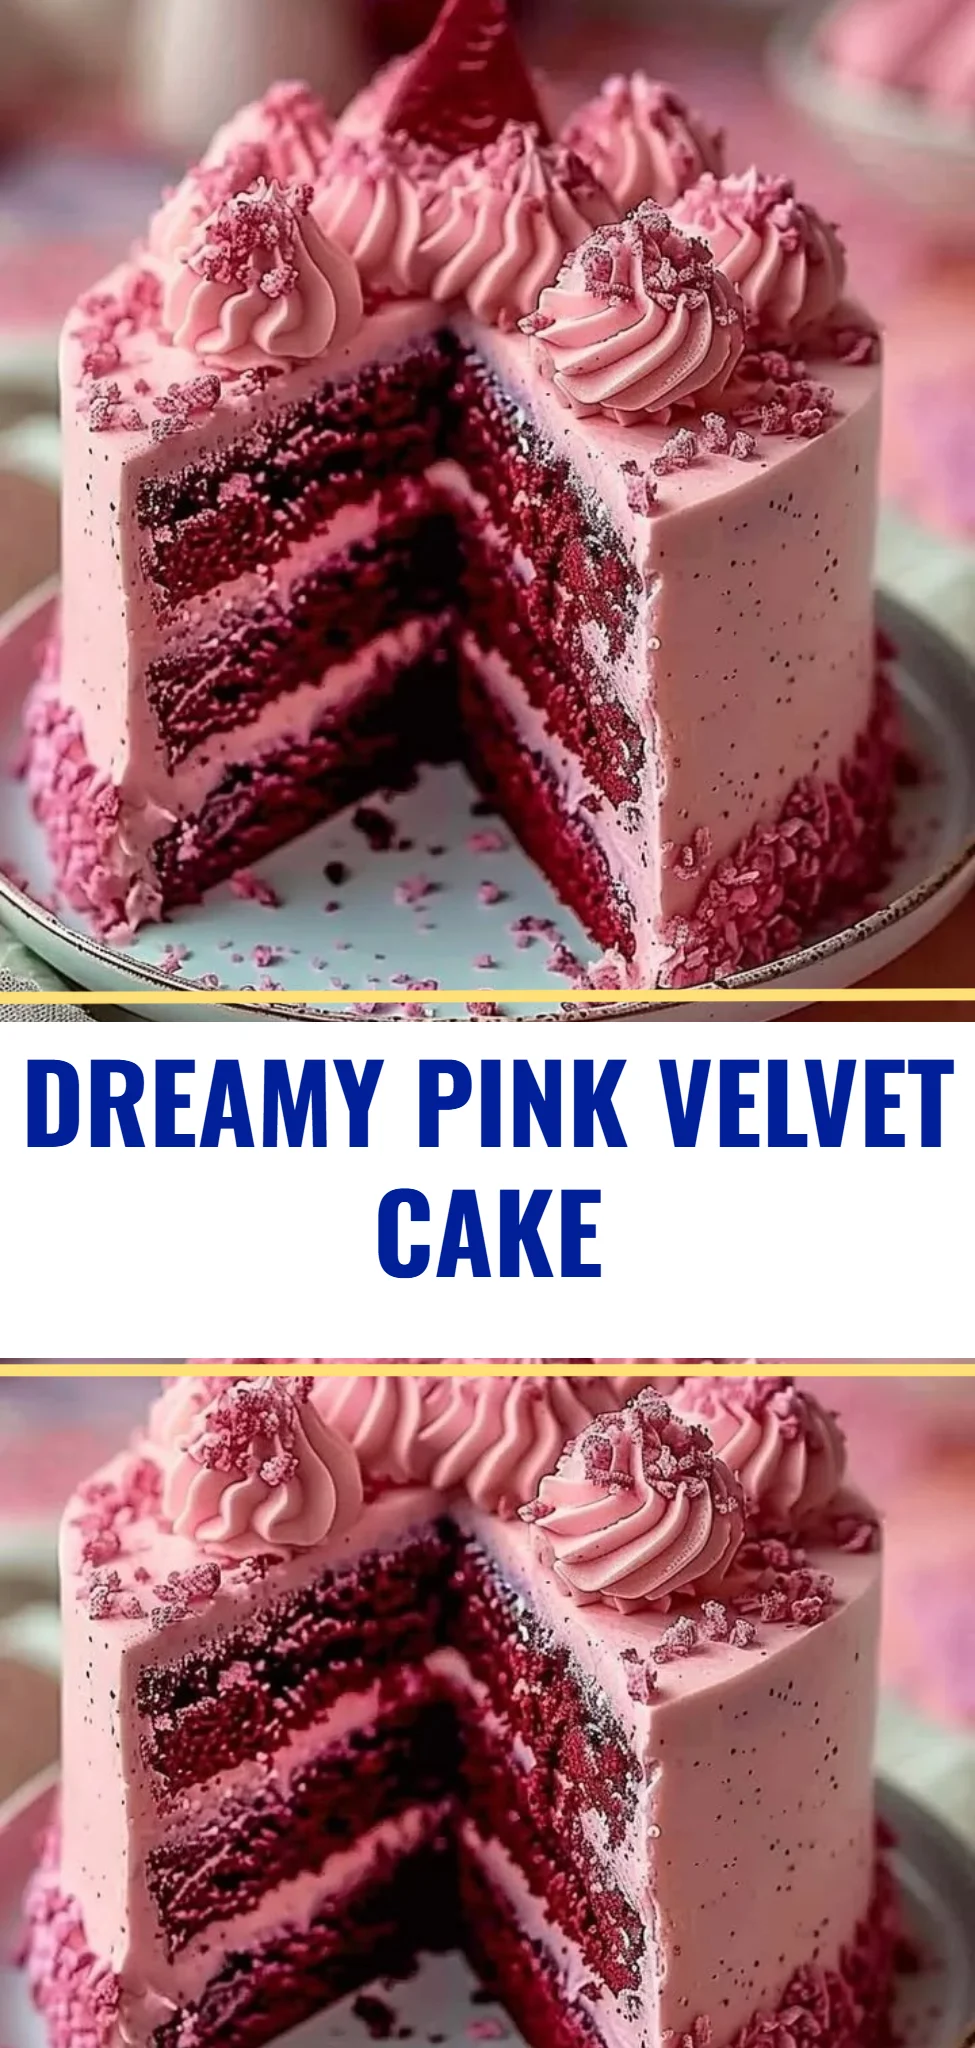
Pink Velvet Dream Cake is a delightful treat that will lead you on a sensory journey of taste and aroma. This cake combines the tenderness of traditional velvet cakes with a charming pink hue that makes it perfect for any occasion — from birthdays to family gatherings. With its rich flavors and creamy frosting, it’s a comforting dessert that brings a sense of nostalgia and joy. And, the best part? This recipe is incredibly easy to follow with a step-by-step approach, ensuring that even novice bakers can create a masterpiece that dazzles and delights.
Ingredients
To craft this stunning Pink Velvet Dream Cake, you will need the following ingredients, each bringing its own unique attribute to the final silky texture and enticing taste:
- 2 1/2 cups all-purpose flour – The foundation of your cake, offering a light and fluffy crumb.
- 1 1/2 cups granulated sugar – Sweetness that perfectly balances the tangy notes.
- 1 teaspoon baking soda – A leavening agent that helps the cake rise beautifully.
- 1 pinch salt – Enhances the flavors and cuts through the sweetness.
- 1 teaspoon cocoa powder – Adds a subtle depth to the cake’s flavor without overpowering the pink beauty.
- 1 1/2 cups vegetable oil – Ensures a moist and tender cake texture.
- 1 cup room-temperature buttermilk – Adds richness and a slight tang that complements the sweetness.
- 2 large eggs – For binding and a tender crumb.
- 2 tablespoons red food coloring – The star that gives this cake its iconic color.
- 1 teaspoon white vinegar – Provides a slight tang that enhances the cake’s tender crumb.
- 1 teaspoon vanilla extract – Aromatic notes that round out the flavor profile.
- 8 ounces cream cheese, softened – For a rich and creamy frosting base.
- 1/2 cup unsalted butter, softened – Adds richness and a smooth texture to your frosting.
- 4 cups powdered sugar – For sweetness and structure in your frosting.
- 1 teaspoon vanilla extract (for frosting) – More delightful aroma to elevate your frosting.
Cooking Time & Tips for Pink Velvet Dream Cake
When preparing your Pink Velvet Dream Cake, you have the option of a quick or a more intricate approach. Quick preparation allows you to whip up this cake in under an hour, providing a satisfying and comforting dessert in no time. However, treading the slow route can deepen flavors, especially as you take time to ensure each layer is baked to perfection.
To ensure success:
- Make sure all ingredients are at room temperature for even mixing.
- Don’t overmix your batter; a few lumps are perfectly fine.
- Use a toothpick to check for doneness to prevent overbaking.
- For frosting, ensure your cream cheese and butter are softened adequately for a smooth blend.
Step-by-Step Directions
Preheat your oven to 350°F (175°C) and grease two 9-inch round cake pans. The aroma of the preheating oven adds an exciting touch to your baking experience.
In a large mixing bowl, whisk together the all-purpose flour, granulated sugar, baking soda, salt, and cocoa powder. The blend of dry ingredients should feel light and airy, evoking a pleasurable anticipation of what’s to come.
In a separate bowl, whisk the vegetable oil, buttermilk, eggs, red food coloring, white vinegar, and vanilla extract together until combined. The vibrant red mixture is sure to brighten your day as you prepare for the delightful cake ahead.
Gradually fold the wet ingredients into the dry mixture, mixing gently until just combined. It’s critical to be gentle to preserve the cake’s fluffy texture, making each stir a moment of connection with your creation.
Divide the batter evenly between the two prepared cake pans. Watching the pastel pink batter fill the pans is a joyous sight, reminding you of the beautiful dessert that awaits.
Bake for 25-30 minutes; check for doneness with a toothpick. The aroma wafting through your kitchen during baking is heavenly, making the wait all the more worthwhile.
Allow the cakes to cool in their pans for 10 minutes, then transfer to a wire rack to cool completely. This crucial cooling step ensures your layers are perfectly set for frosting.
For the frosting, beat the softened cream cheese and unsalted butter until smooth and creamy. The texture should be light and fluffy, evoking a feeling of indulgence.
Gradually add the powdered sugar and vanilla extract, continuing to beat until light and fluffy. Licking the spatula becomes an undeniable temptation as the sweet and creamy frosting takes shape.
Place one cake layer on your serving plate and frost generously between the layers, then on top and around the sides of the cake. The layers should be lush with frosting, creating an inviting exterior.
Decorate as desired with sprinkles or edible flowers. This final touch adds a whimsical flair, making your Pink Velvet Dream Cake not only delicious but a feast for the eyes.
Serving Suggestions & Occasions
Your beautifully baked Pink Velvet Dream Cake is perfect for a wide array of celebrations. Serve it at birthdays, bridal showers, or family gatherings to create memories that are sweet and unforgettable. Pair it with a scoop of vanilla ice cream or a dollop of whipped cream to elevate the experience further. Add a side of fresh berries for a vibrant, contrasting flavor that complements the sweet richness of the cake.
Common Mistakes for Pink Velvet Dream Cake
When preparing your Pink Velvet Dream Cake, some common pitfalls can arise:
- Overmixing the batter: This can result in a dense cake instead of a light, fluffy one.
- Incorrect oven temperature: An oven that’s too hot can lead to burning, while one that’s too cool can make for undercooked layers.
- Skipping cooling time: Frosting a hot cake will lead to melting and sliding frosting, creating a messy appearance.
- Not testing for doneness: Relying solely on baking time instead of performing the toothpick test can result in a cake that is either too dry or too wet.
Healthier Alternatives & Variations
If you’re looking to make a healthier version of the Pink Velvet Dream Cake, consider these alternatives:
- Use whole wheat flour instead of all-purpose for added fiber.
- Substitute half of the vegetable oil with applesauce for reduced fat while maintaining moisture.
- Opt for a sugar substitute to lower the calorie content.
- Dairy-free options can be achieved using almond or oat milk in place of buttermilk, and vegan cream cheese in the frosting.
FAQs
Can I use different food coloring?
Yes! You can experiment with other colors to create a unique variation of this cake.How long does the cake last?
The cake can be stored in an airtight container in the fridge for up to 5 days.Can I freeze the cake?
Absolutely! You can freeze the un-frosted cake layers for up to 3 months. Just be sure to wrap them well.What can I use if I don’t have buttermilk?
You can create a buttermilk substitute by mixing milk with a tablespoon of vinegar and letting it sit for 5-10 minutes.Can I make this into cupcakes?
Sure! Simply pour the batter into cupcake liners and bake for 15-20 minutes.Is this cake suitable for special dietary needs?
Yes! With the mentioned alternatives, you can cater to gluten-free, dairy-free, or lower-calorie diets.
Conclusion
Pink Velvet Dream Cake is not just a dessert; it’s an experience that brings joy and comfort to any gathering. The delightful combination of soft, tender cake layers paired with creamy frosting will surely tempt you to try this recipe immediately. Don’t wait any longer to create your own masterpiece; follow the steps, enjoy the process, and relish in the happiness this cake brings to your palate!
PrintPink Velvet Dream Cake

A delightful Pink Velvet Dream Cake combining tenderness and a charming hue, perfect for celebrations.
- Prep Time: 15 minutes
- Cook Time: 30 minutes
- Total Time: 45 minutes
- Yield: 12 servings 1x
- Category: Dessert
- Method: Baking
- Cuisine: American
- Diet: Vegetarian
Ingredients
- 2 1/2 cups all-purpose flour
- 1 1/2 cups granulated sugar
- 1 teaspoon baking soda
- 1 pinch salt
- 1 teaspoon cocoa powder
- 1 1/2 cups vegetable oil
- 1 cup room-temperature buttermilk
- 2 large eggs
- 2 tablespoons red food coloring
- 1 teaspoon white vinegar
- 1 teaspoon vanilla extract
- 8 ounces cream cheese, softened
- 1/2 cup unsalted butter, softened
- 4 cups powdered sugar
- 1 teaspoon vanilla extract (for frosting)
Instructions
- Preheat your oven to 350°F (175°C) and grease two 9-inch round cake pans.
- Whisk together the all-purpose flour, granulated sugar, baking soda, salt, and cocoa powder in a large mixing bowl.
- Combine the vegetable oil, buttermilk, eggs, red food coloring, white vinegar, and vanilla extract in a separate bowl.
- Fold the wet ingredients into the dry mixture, mixing gently until just combined.
- Divide the batter evenly between the two prepared cake pans.
- Bake for 25-30 minutes; check for doneness with a toothpick.
- Cool the cakes in their pans for 10 minutes, then transfer to a wire rack to cool completely.
- Beat the softened cream cheese and unsalted butter until smooth and creamy for the frosting.
- Add the powdered sugar and vanilla extract, continuing to beat until light and fluffy.
- Frost one cake layer on your serving plate, then add frosting between layers and around the sides.
- Decorate as desired with sprinkles or edible flowers.
Notes
Ensure all ingredients are at room temperature for even mixing. Don’t overmix the batter, and check for doneness using a toothpick.
Nutrition
- Serving Size: 1 slice
- Calories: 350
- Sugar: 28g
- Sodium: 200mg
- Fat: 15g
- Saturated Fat: 8g
- Unsaturated Fat: 5g
- Trans Fat: 0g
- Carbohydrates: 50g
- Fiber: 1g
- Protein: 3g
- Cholesterol: 75mg