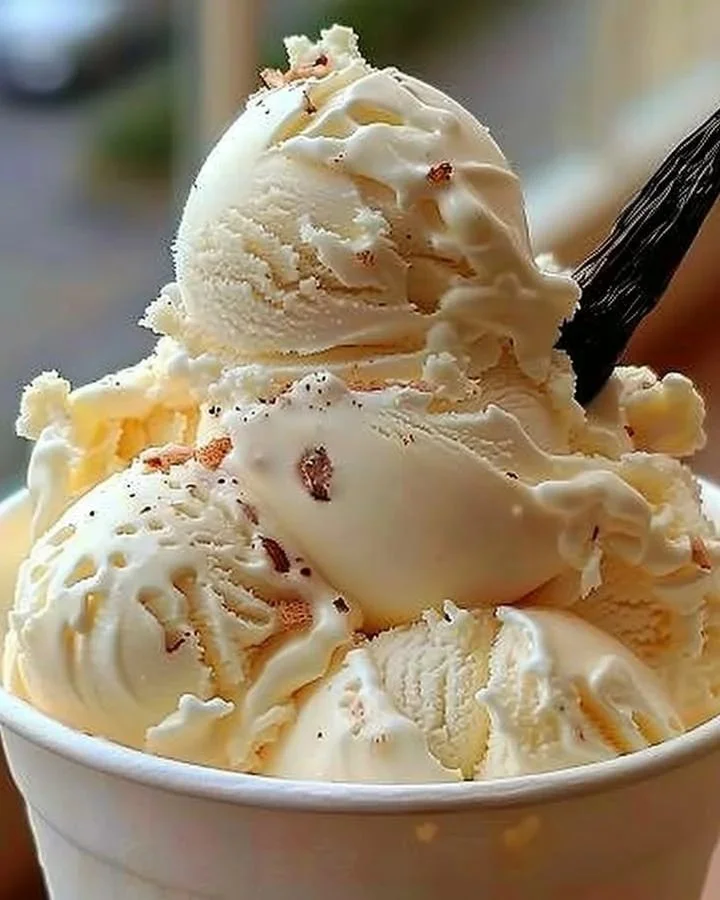
Homemade Vanilla Ice Cream is the perfect treat for everyone who loves indulging in creamy, delicious desserts. This nostalgic dessert evokes memories of hot summer days spent by the pool or cozy winter evenings with family. Not only is this recipe incredibly easy to make, but it also brings a sense of comfort to any occasion, making it an ideal choice for family gatherings, casual get-togethers, or simply enjoying on your own. Follow this step-by-step guide for crafting your very own mouthwatering vanilla ice cream from scratch!
Ingredients
To create your Homemade Vanilla Ice Cream, gather the following ingredients:
- 2 cups heavy cream: Offering a creamy richness, the heavy cream serves as the beautiful base that makes every scoop luxurious.
- 1 cup whole milk: This adds a perfect balance of creaminess; whole milk keeps the ice cream smooth and tender.
- 3/4 cup granulated sugar: Sweetness is key! The granulated sugar will dissolve beautifully, enhancing the overall flavor.
- 1 vanilla bean (or 2 tsp pure vanilla extract): For an aromatic depth, using a vanilla bean lends both seeds and pod to the mix, resulting in a delectable, floral essence.
- 4 large egg yolks: These create a velvety texture that thickens the custard to perfection.
- A pinch of salt: The salt enhances the sweetness and balances flavors beautifully.
Cooking Time & Tips For Homemade Vanilla Ice Cream
Creating Homemade Vanilla Ice Cream can be quick or slow, depending on your approach. A quicker method may involve premade mixes and a simple churn, but nothing compares to the depth of flavor in a slow-cooked custard. While the traditional approach takes a bit more time, the payoff is undoubtedly worth it.
Here are some practical tips for success:
- Ensure your ice cream maker is properly chilled for efficient churning.
- Whisk continuously while cooking to prevent the egg yolks from curdling.
- Allow ample time in the fridge to let the flavors develop; overnight chilling yields the best results.
Step-by-Step Directions
In a medium saucepan, combine the heavy cream, whole milk, and granulated sugar. Heat over medium heat, stirring occasionally until hot but not boiling. This initial blend should warm the mixture nicely and melt the sugar into a sweet elixir.
Split the vanilla bean and scrape out the seeds, adding both seeds and pod to the saucepan. This step is where your ice cream will start to gain its aromatic and rich vanilla flavor.
In a separate bowl, whisk the egg yolks with a pinch of salt until pale and thickened. This process is vital for achieving that luxuriously creamy texture that makes homemade ice cream stand out.
Gradually pour a small amount of the hot milk mixture into the egg yolks, whisking constantly. This practice, known as tempering, gently raises the temperature of the yolks to avoid curdling.
Continue adding the remaining milk mixture while whisking until combined, then return to the saucepan. This keeps everything blended and prevents any lumps from forming.
Cook over low heat, stirring constantly until the custard thickens slightly and coats the back of a spoon (about 170°F / 77°C). Watch for this critical moment where your mixture transforms into a smooth custard.
Strain the custard through a fine-mesh sieve into a clean bowl. This ensures that any unmixed bits or the vanilla pod are removed, leaving you with a silky base.
Cool to room temperature, cover, and refrigerate for at least 4 hours or overnight. Patience is key as chilling enhances the flavors and results in a creamier texture.
Churn the chilled custard in an ice cream maker according to the manufacturer’s instructions. As the mixture churns, it will aerate, creating that soft and creamy ice cream we crave.
Transfer to an airtight container and freeze for an additional 4 hours or until firm. After this step, your delicious Homemade Vanilla Ice Cream will be ready for scooping!
Serving Suggestions & Occasions
Homemade Vanilla Ice Cream is remarkable on its own, but it can also elevate many desserts. Serve it alongside warm brownies for a delightful contrast or layer it in a sundae with chocolate sauce and fresh berries for a stunning dessert centerpiece. Whether it’s a birthday party or a family barbecue, this ice cream is sure to bring joy to everyone involved.
Common Mistakes For Homemade Vanilla Ice Cream
Making homemade ice cream can lead to some common pitfalls. Here are a few to avoid:
- Don’t rush the cooking process; ensure the custard is thick enough before straining.
- Skipping the chilling step may yield an icy rather than creamy texture.
- Make sure your egg yolks are mixed thoroughly for a uniform consistency.
Healthier Alternatives & Variations
For those looking for healthier alternatives, consider using coconut milk instead of whole milk for a dairy-free option, or try sweetening with honey or maple syrup instead of granulated sugar. You can also add mix-ins like crushed fruits or nuts to introduce exciting flavors and textures. For chocolate lovers, folding in cocoa powder can transform your vanilla ice cream into a heavenly chocolate delight.
FAQs
Can I use store-bought vanilla extract instead of a vanilla bean?
Yes! Pure vanilla extract is a great substitute, but a vanilla bean offers richer flavor.Do I need an ice cream maker?
While an ice cream maker is ideal for a smooth texture, you can freeze the mixture in a bowl, stirring every 30 minutes until firm.How long will my ice cream last in the freezer?
Homemade vanilla ice cream can last for about two weeks if properly stored in an airtight container.Can I double the recipe?
Absolutely! Just ensure your ice cream maker can handle a larger batch and adjust your chilling times accordingly.Is there a vegan option for this recipe?
Yes! Replace the heavy cream and whole milk with coconut milk, and use cornstarch instead of egg yolks for a creamy vegan delight.How can I avoid ice crystals in my ice cream?
Make sure to churn the custard thoroughly and freeze it in an airtight container to minimize exposure to air.
Conclusion
Homemade Vanilla Ice Cream is a delight that you can easily craft in your own kitchen, bringing joy and comfort to any occasion. The satisfying process paired with the blissful flavors is irresistible. With its rich creaminess and nostalgic essence, you’ll want to make it again and again. So gather your ingredients and let the churning begin—your taste buds will thank you!
PrintHomemade Vanilla Ice Cream

A creamy and nostalgic dessert that evokes memories of summer days, perfect for any occasion.
- Prep Time: 30 minutes
- Cook Time: 20 minutes
- Total Time: 60 minutes
- Yield: 4 servings 1x
- Category: Dessert
- Method: Churning
- Cuisine: American
- Diet: Vegetarian
Ingredients
- 2 cups heavy cream
- 1 cup whole milk
- 3/4 cup granulated sugar
- 1 vanilla bean (or 2 tsp pure vanilla extract)
- 4 large egg yolks
- A pinch of salt
Instructions
- Combine heavy cream, whole milk, and granulated sugar in a medium saucepan. Heat over medium until hot but not boiling.
- Split the vanilla bean and scrape out the seeds, adding both seeds and pod to the saucepan.
- Whisk the egg yolks with a pinch of salt in a separate bowl until pale and thickened.
- Gradually pour hot milk mixture into the egg yolks, whisking constantly to temper.
- Continue adding remaining milk mixture while whisking until combined, then return to the saucepan.
- Cook over low heat, stirring constantly until custard thickens slightly (about 170°F / 77°C).
- Strain custard through a fine-mesh sieve into a clean bowl.
- Cool to room temperature, cover, and refrigerate for at least 4 hours or overnight.
- Churn chilled custard in an ice cream maker according to manufacturer’s instructions.
- Transfer to an airtight container and freeze for an additional 4 hours or until firm.
Notes
Ensure your ice cream maker is properly chilled before use and whisk continuously while cooking to prevent curdling.
Nutrition
- Serving Size: 1 serving
- Calories: 300
- Sugar: 25g
- Sodium: 50mg
- Fat: 20g
- Saturated Fat: 12g
- Unsaturated Fat: 7g
- Trans Fat: 0g
- Carbohydrates: 30g
- Fiber: 0g
- Protein: 4g
- Cholesterol: 200mg